Ubuntu Auto Install
I’ll be honest. Ubuntu’s autoinstall system took me a while to fully wrap my head around. Even after doing a full Microsoft Deployment Toolkit series, this one still put up a fight. But after plenty of trial and error, I finally got a setup that works reliably and exactly the way I want.
The Basics
Ubuntu’s autoinstall system lets you fully automate server deployments-no clicking through menus, no manual partitioning, no typing usernames. Once configured, you can rebuild machines in minutes with a consistent, repeatable setup.
The installer makes use of a configuration file in YAML format. It has a number of sections with different options. You can use as many as you like.
But we do not need to use all sections for a successful install.
This is a minimal auto install file that would work.
#cloud-config
autoinstall:
  version: 1
  keyboard:
    layout: us
    toggle: null
    variant: ""
  locale: en_US.UTF-8
  identity:
    hostname: hostname
    username: adminusername
    password: $6$password hash
  ssh:
    install-server: true
    authorized-keys:
      - ssh-your key
    allow-pw: false
  timezone: "Your/Timezone"
This works, but I have found I need to add the network section as well. Without it, on VMs I have been testing, the installer gets stuck setting up the network card. Also, it is better to add a few more sections, like disk selection, packages to install and some post install commands to configure the system after installation.
Every Ubuntu install generates the auto install file. It happens in the background automatically. So for an easy reference, try an install manually one time and reference this file for your device.
The file is located in /var/log/installer/autoinstall-user-data
You can use this file to get most of the details you need.
Autoinstall Configuration
Keyboard and locale and timezone
keyboard:
  layout: us
  toggle: null
  variant: ""
locale: en_US.UTF-8
timezone: "Australia/Adelaide"
While this should be easy to fill up, you can check your current locale and keyboard layout using the locale and localectl status commands
$ locale
LANG=en_US.UTF-8
LANGUAGE=
LC_CTYPE="en_US.UTF-8"
LC_NUMERIC="en_US.UTF-8"
LC_TIME="en_US.UTF-8"
LC_COLLATE="en_US.UTF-8"
LC_MONETARY="en_US.UTF-8"
LC_MESSAGES="en_US.UTF-8"
LC_PAPER="en_US.UTF-8"
LC_NAME="en_US.UTF-8"
LC_ADDRESS="en_US.UTF-8"
LC_TELEPHONE="en_US.UTF-8"
LC_MEASUREMENT="en_US.UTF-8"
LC_IDENTIFICATION="en_US.UTF-8"
LC_ALL=
$ localectl status
System Locale: LANG=en_AU.UTF-8
    VC Keymap: us
   X11 Layout: us
    X11 Model: pc105+inet
  X11 Options: terminate:ctrl_alt_bksp
To know the right timezone to use, you can check your current timezone.
# output has been trimmed
$ timedatectl
Time zone: Australia/Adelaide (ACST, +0930)
Primary install drive
storage:
  layout:
    name: direct
    match:
      ssd: true
This setting would install Ubuntu to the first matching SSD drive found. This should be fine, but in if you have multiple drives, you might need to add more matching conditions to get the right drive.
To be safe, it is also better to unplug any data drives you do not want to overwrite, just to be safe.
Matching the right drive
Match the smallest SSD
match:
  size: smallest
  ssd: true
Match the device on /dev/sda
match:
  path: /dev/sda
Auto install also support things like device ID or vendor ID with wildcard matching.
To find the details of your installation drive (/dev/sda in this case)
$ udevadm info --query=property --name=/dev/sda``

ID_VENDOR=ATA
ID_VENDOR_ENC=ATA\x20\x20\x20\x20\x20
ID_MODEL=SK_hynix_SC311_S
ID_MODEL_ENC=SK\x20hynix\x20SC311\x20S
We can then match any SK_hynix* drive. This will first match any drive with the right model, else match an SSD that has the smallest size.
match:
  model: SK_hynix_*
  ssd: true
  size: smallest
Network
network:
  ethernets:
    enp0s3:
      dhcp4: true
      dhcp6: true
  version: 2
Network DHCP will try to get an IP from a DHCP server during install. If you have dhcp6 set, the installer will try to get an IPv6 address. This is where I found the installer getting stuck during installation on a VM. Adding IPv6 access for the VM fixed the issue.
Identity
You need to specify the password of the admin user. I used openssl to generate the password
$ openssl passwd -6 -salt 'YourSaltedValue' "your-secure-password"

$6$YourSaltedValue$AiftzFZN5qGoXZIrrTy5M4t1nBibn/HxiHWEvgEz.XvoHY603f/7dMMtgoUKQQGKZH7EADu/SjrTzQRxVNE8.1
Note, you do not need to use
-salt 'YourSaltedValue'. Without it, a random salt value is used. Adding your own salt value means the same hash gets generated each time.
Then use the value in the Identity section
identity:
  hostname: myserver
  username: serveradmin
  password: $6$YourSaltedValue$AiftzFZN5qGoXZIrrTy5M4t1nBibn/HxiHWEvgEz.XvoHY603f/7dMMtgoUKQQGKZH7EADu/SjrTzQRxVNE8.1
SSH Access
ssh:
  install-server: true
  authorized-keys:
    - ssh-ed25519 your ssh public key
  allow-pw: false
Get your key from *.pub available in your ~/.ssh folder. Or generate a new key to use and paste it here.
Packages
packages:
  - curl
  - git
  - micro
  - rsync
  - htop
  - net-tools
  - unattended-upgrades
Add what you need. I prefer to use Micro rather than Nano for editing files. You do not need to add everything, if you will be doing other automations later (like Ansible). Just add the basics to get started.
Post install commands
late-commands:
  - echo 'serveradmin ALL=(ALL) NOPASSWD:ALL' > /target/etc/sudoers.d/serveradmin
  - chmod 440 /target/etc/sudoers.d/serveradmin
This enables passwordless sudo for the serveradmin user.
Saving the file.
Here is what our final file looks like
#cloud-config
autoinstall:
  version: 1
  keyboard:
    layout: us
    toggle: null
    variant: ""
  locale: en_US.UTF-8
  timezone: "Australia/Adelaide"
  storage:
    layout:
      name: direct
      match:
        ssd: true
  network:
    ethernets:
      enp0s3:
        dhcp4: true
        dhcp6: true
    version: 2
  identity:
    hostname: myserver
    username: serveradmin
    password: $6$YourSaltedValue$AiftzFZN5qGoXZIrrTy5M4t1nBibn/HxiHWEvgEz.XvoHY603f/7dMMtgoUKQQGKZH7EADu/SjrTzQRxVNE8.1
  ssh:
    install-server: true
    authorized-keys:
      - ssh-ed25519 your ssh public key
    allow-pw: false
  packages:
    - curl
    - git
    - micro
    - rsync
    - htop
    - net-tools
    - unattended-upgrades
  late-commands:
    - echo 'serveradmin ALL=(ALL) NOPASSWD:ALL' > /target/etc/sudoers.d/serveradmin
    - chmod 440 /target/etc/sudoers.d/serveradmin
Save the configuration file as user-data. In the same folder, also create 2 empty files. meta-data and vendor-data. Those are the 3 files you need to pass on to the Ubuntu installer.
It might be a good idea to also make copies of the configuration files for different devices you might have. Have each set of config files in a different folder. For example:
autoinstall/
├── vms/
│   ├── user-data
│   ├── meta-data
│   └── vendor-data
├── delloptiplex/
│   ├── user-data
│   ├── meta-data
│   └── vendor-data
└── hpservers/
    ├── user-data
    ├── meta-data
    └── vendor-data
Setting up
Next challenge is how to pass the config file to the installer. There are 3 options
- Add to root of installer CD/ISO/USB
- Bake into ISO file
- Network path
Add to root of installer CD/ISO/USB
Works, but most ISO to USB tools write to USB as read only. If you can write your ISO to USB and leave the USB as writeable, add an autoinstall.yml file (basically the user-data file) in the root of the drive.
You end up with read only USBs, one workaround is to extract the ISO, add the file and write a new ISO file from the extracted path. Then write this new ISO to USB. This works but I find it slow for testing. For a finalized config file, that is fine.
Note, with the file on the disk/USB, you do get a prompt to confirm you want to start the installation.
Bake into ISO file
Most cumbersome to do, and pretty much similar to the step above. Useful for VMs where you mount ISO files. Refer to Embedding in a autoinstall in a Custom ISO
Network Path
Serve the auto install files over HTTP, and point your installer to that path. This is the easiest to setup in my opinion, where you have access to the device during the boot process.
When the boot menu appears, press e
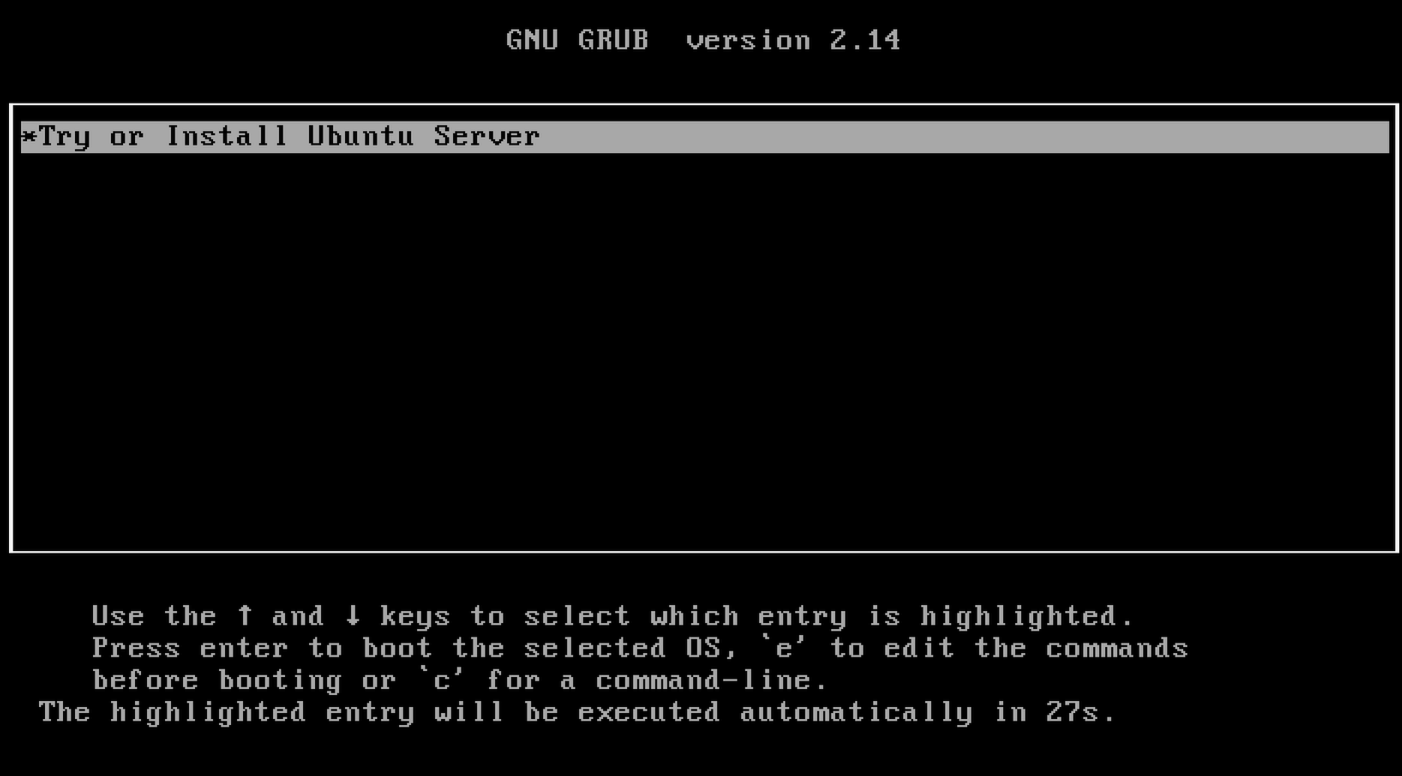
We need to edit the second line to tell the installer where our auto install files are located.
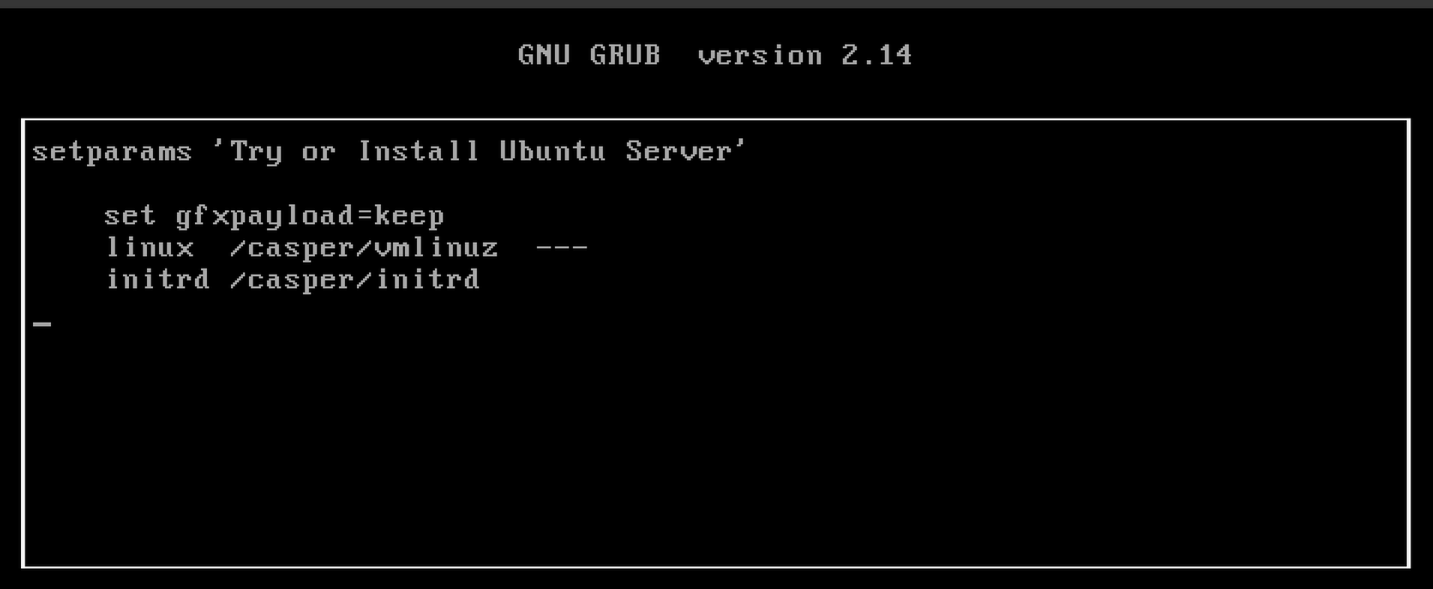
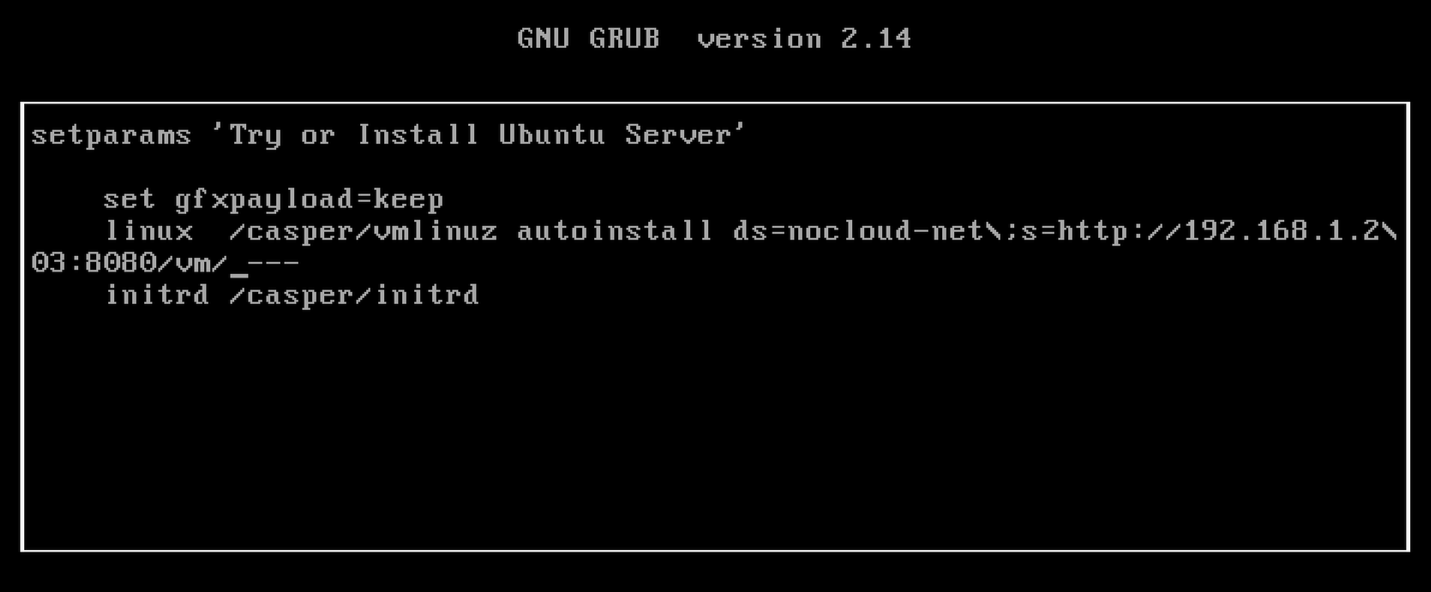
Add the following just before ---
autoinstall ds=nocloud-net\;s=<directory-URL>
This needs to be the path to a folder that has your auto install files. Also note the \ character, which is used to escape the ; character
Like so:
For testing, I am using Python as a basic web server. From the root autoinstall configuration path, I run: python3 -m http.server 8080.
Configuration is now available from http://myip:8080/subfolders
You can serve several configs in different subfolders.
E.g.
http://myip:8080/delloptiplexorhttp://myip:8080/lenovothinkpadorhttp://myip:8080/vm
Press F10 to start the installation.
Eventually, you will see the installer reaching out to get the configurations files in the Python console.
192.168.1.145 - - [10/Jun/2026 10:03:44] "GET /vm/meta-data HTTP/1.1" 200 -
192.168.1.145 - - [10/Jun/2026 10:03:44] "GET /vm/user-data HTTP/1.1" 200 -
192.168.1.145 - - [10/Jun/2026 10:03:44] "GET /vm/vendor-data HTTP/1.1" 200 -
With this setup, I can rebuild any of my homelab machines-VMs, desktops, or servers-in a fully automated way. Once you get the hang of it, autoinstall becomes one of the most powerful tools in your homelab workflow.